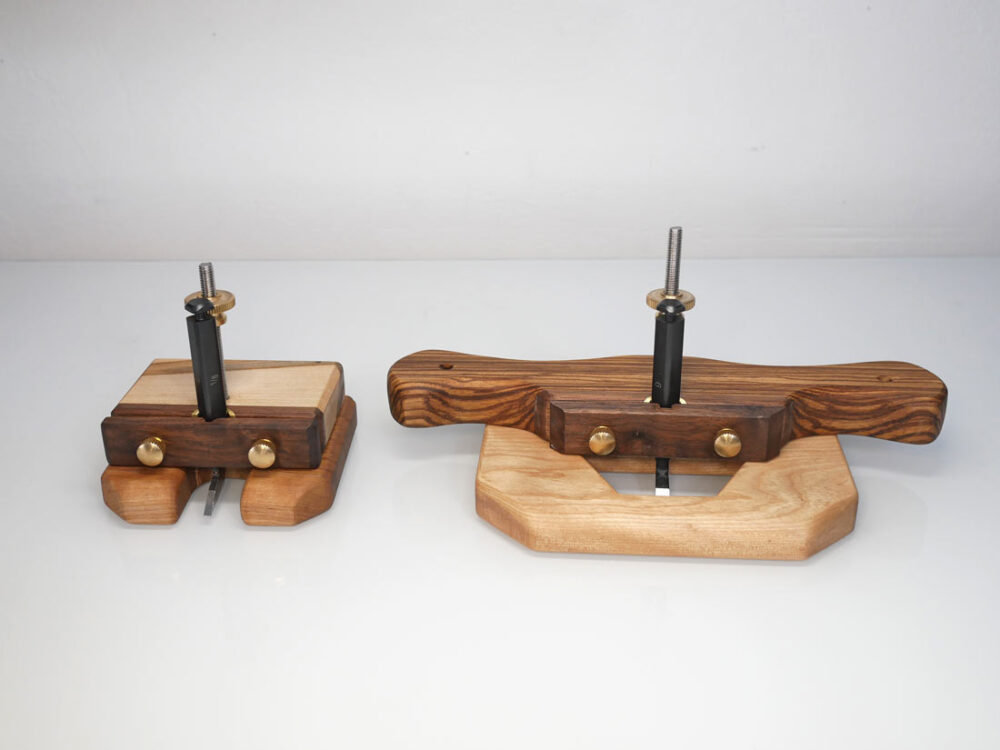
This is part 3 of my DIY router plane and I will introduce the hardware I used and the tips of making the router planes.
For the router plane plans, please check part 1(Bigger one) or part 2(Smaller one).
You can also check the video.
- DIY Router Project
- A DIY Router Plane with Interchangeable Base – Part 1
- A DIY Router Plane with Interchangeable Base – Part 2
Hardware
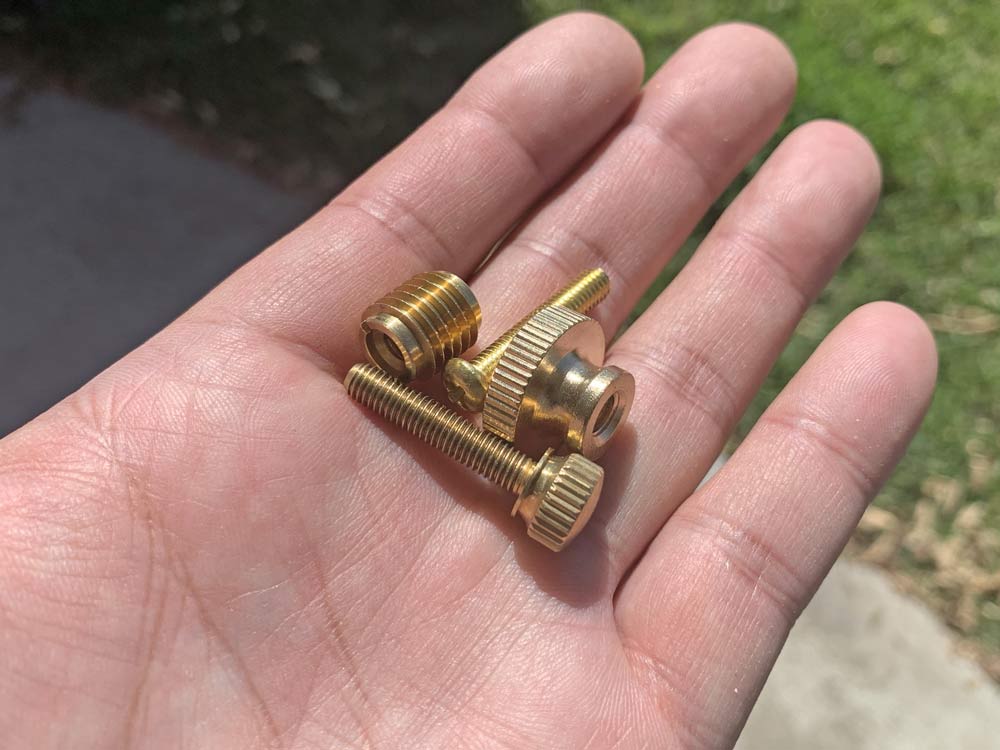
As I purchased a small quantity of the hardware only for these 2 router planes, it wasn’t cheap! Please note that just getting the following hardware may cost you $50-60 and you will need to buy a Veritas cutting iron that is about $20. The number inside “(#)” is the quantity I used for one router.
- Hardware
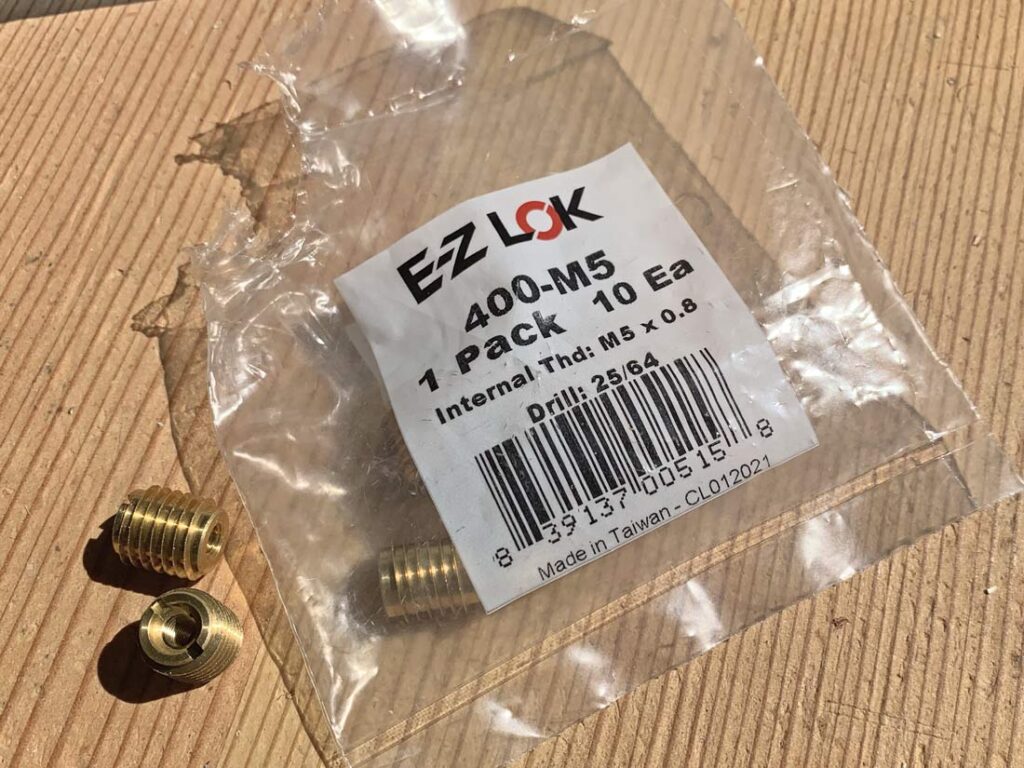
- E-Z LOK M5 – 0.8 1/2″length Threaded Insert Pack of 10 (5)
- Brass Machine Screws, M5x25mm Phillips Pan Head 20Pcs (3)
- Knurled Thumb Screws, M5x25mm 5Pcs (2)
- Knurled Thumb Nuts, 4pcs M6 x D20mm x H12mm (1)
- 2Pcs M6 x 150mm Fully Threaded Rod 304 Stainless Steel (1/2)
- K & S Precision Metals 8248 Brass Strip 0.064″(Little)
You don’t have to get the same hardware as I got but the plans in Part 1 & Part 2 are based on the specific hardware above that I purchased.
Just as a side note, other than the thumb nut, they don’t have to be brass but 304 stainless steel can be more durable and a better choice.
Tools
I used no special tools but if you don’t have tools for metal fabrication(we do woodworking!), I used the following tools and they worked for me.
OLSON SAW CP30000BL Coping Saw Blade Assortment – I got it for less than $5 on sale and this set comes with a blade for cutting metal. This worked so well. If you don’t have a coping saw, mine is this one that you can get it for less than $10 when it’s on sale.
Nicholson Half-Round Hand File – This is a reasonable coarse cutting file for metal that I used. For the fine finish, you can just use sanding paper.
Fabrication Tips
I won’t go over every step but some key points that are critical. I may add some more tips according to questions I have from you (Please leave comments on YT)!
Dimensioning Wood
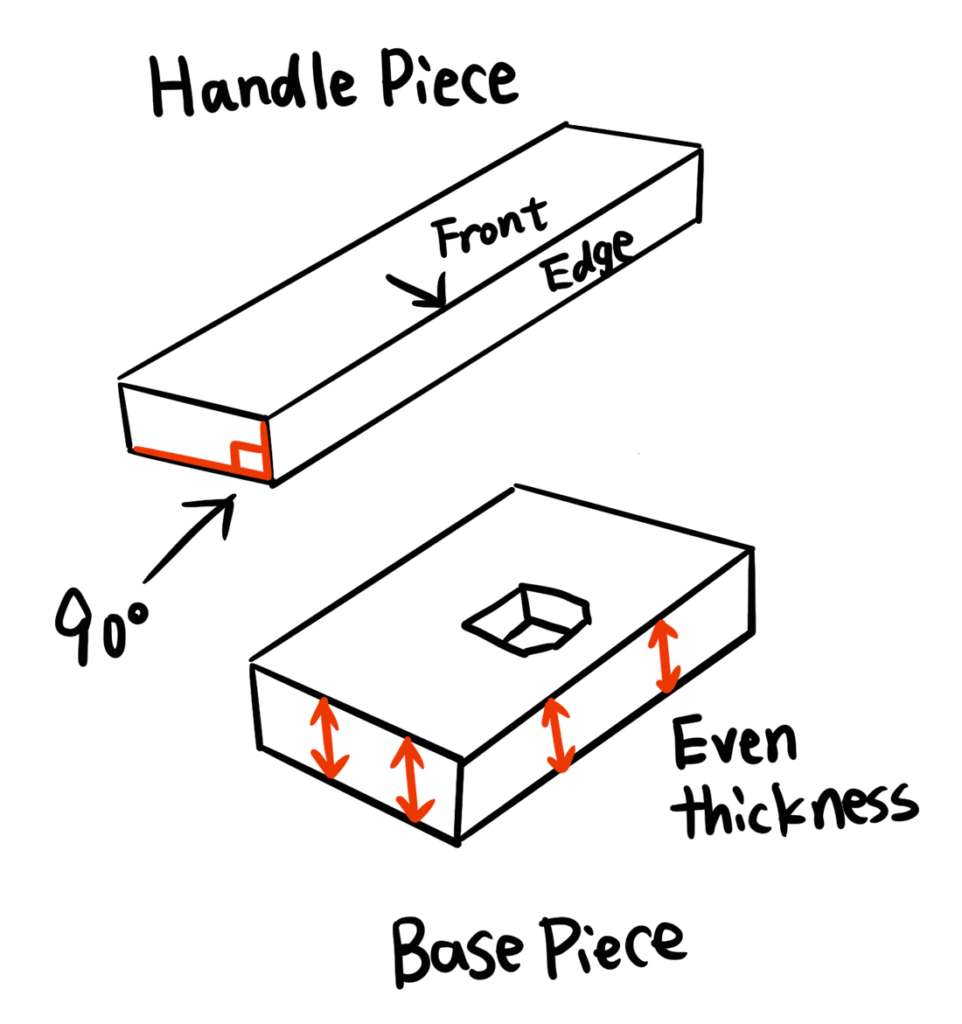
If you are good at dimensioning wood, there is no problem but if you are not, please focus on making one edge square to the face for the main body piece.
In addition, the base piece thickness has to be really consistent so you can use the plywood if you are not confident.
My friend told me a polycarbonate sheet works great, too (but it may need a riser piece for my router design unless there is 3/4″ thick one for a reasonable price so it can become more complicated…).
Clamping
Miter Cut on Clamping Pieces
I know this is the most scary part but please do your best on the miter cut on the wood pieces and you can see how I did for the brass pieces from my video around 3:19(linked to YT). The thing is, they have to be accurate but it doesn’t have to be perfect:)
If this makes you hesitate to do this project, don’t worry just try it. I will explain the correction process in the next section.
Correcting the Miter by Brass Pieces
First, you need to glue(wood glue) the wood pieces on the main body and then wait until it’s dry (I used Titebond3 and waited for only like 2 hours).
Now, please clean the brass pieces by rubbing alcohol as you put oil on them when you cut them. Additionally, you need to scratch the brass pieces for the better adhesion.
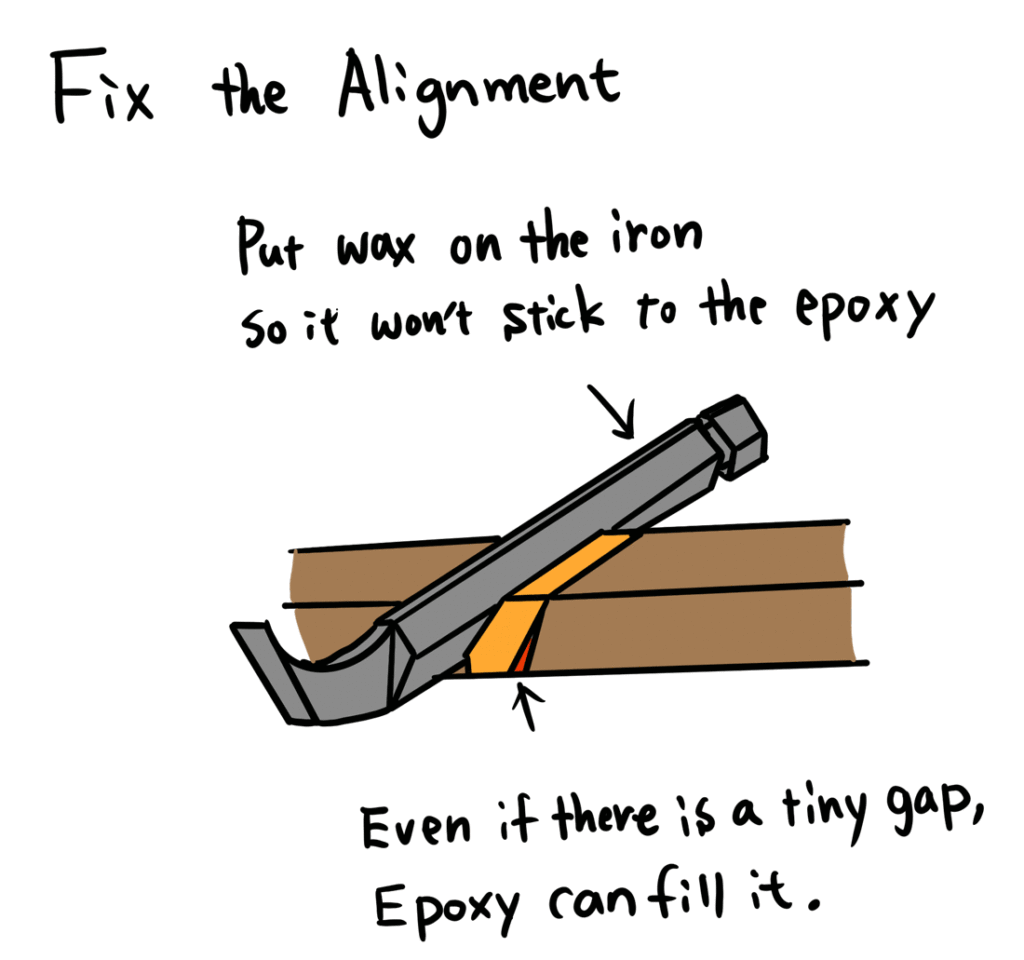
Then, here is the trick. I used 30mins epoxy glue for the brass pieces (Maybe 5min is better?). After mixing the epoxy glue well, you will let it harden a little bit and then apply it on both wood and brass surfaces. In the mean time, you can put paste wax on the cutting iron.
Then, you can put the brass pieces on the wood. If the epoxy is hard/sticky enough, you can place the cutting iron on it and adjust the brass pieces to find the right position. Even if there is a little gap between the brass and the wood, it will be filled by epoxy so you can get a perfectly aligned clamping jaw.
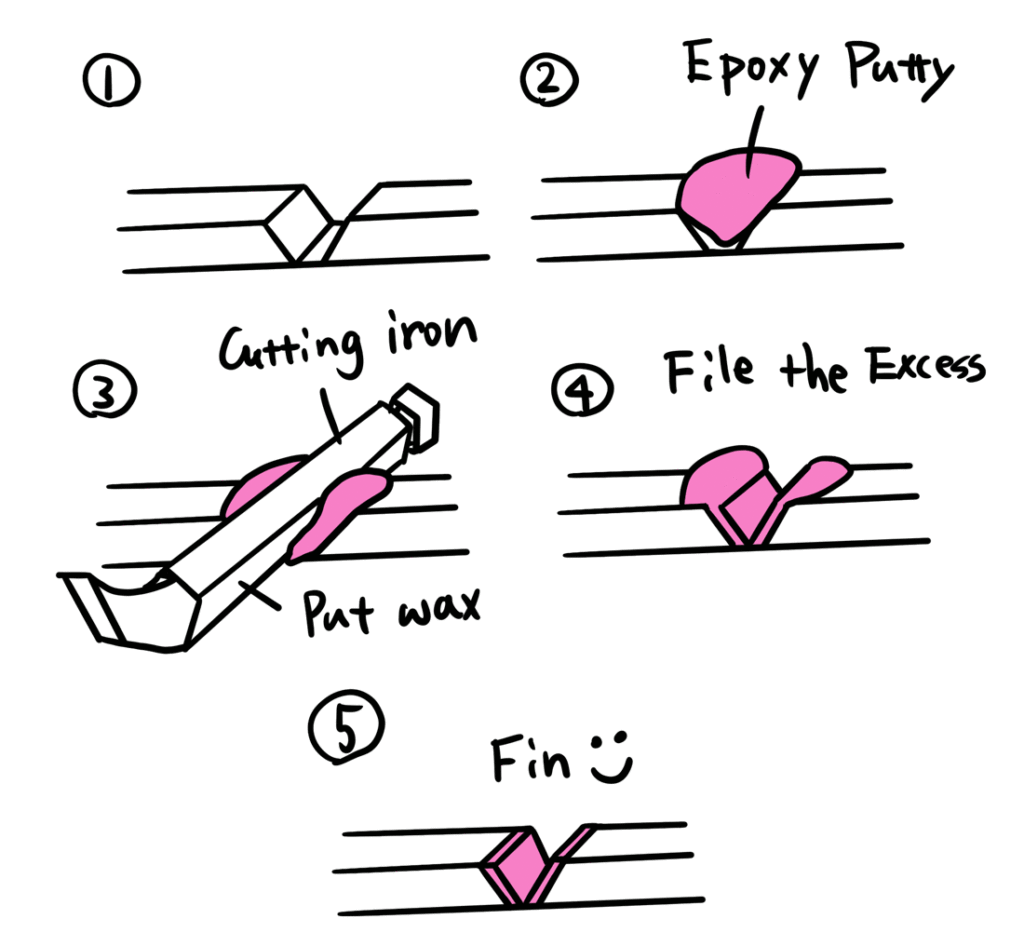
As an alternative way, you can just use epoxy putty . You just need to place the epoxy putty and place the cutting iron(waxed) over it to form the shape for the best position. You don’t even need the brass pieces.
Finishing the Clamping Pieces
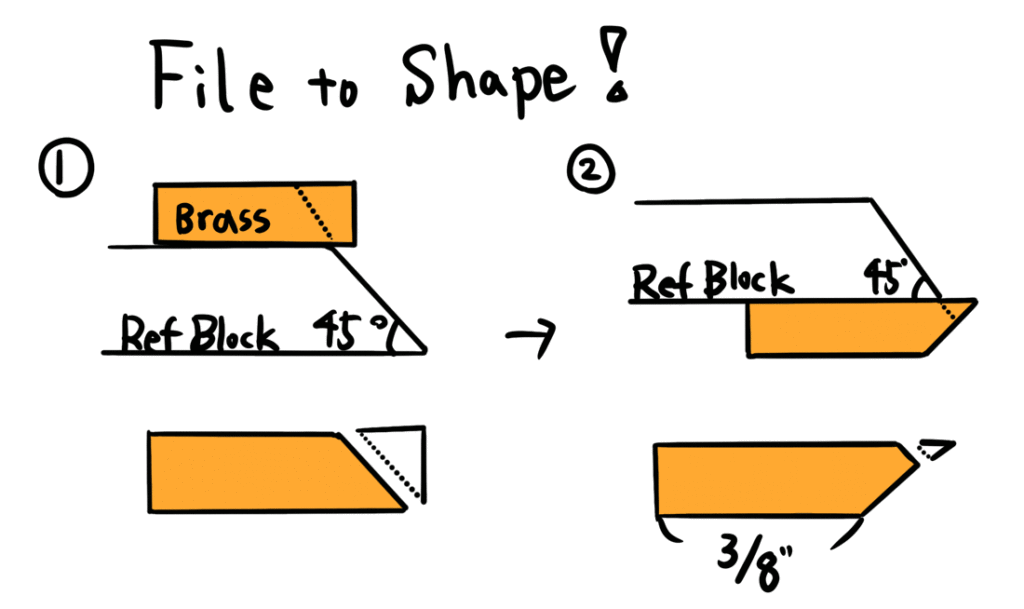
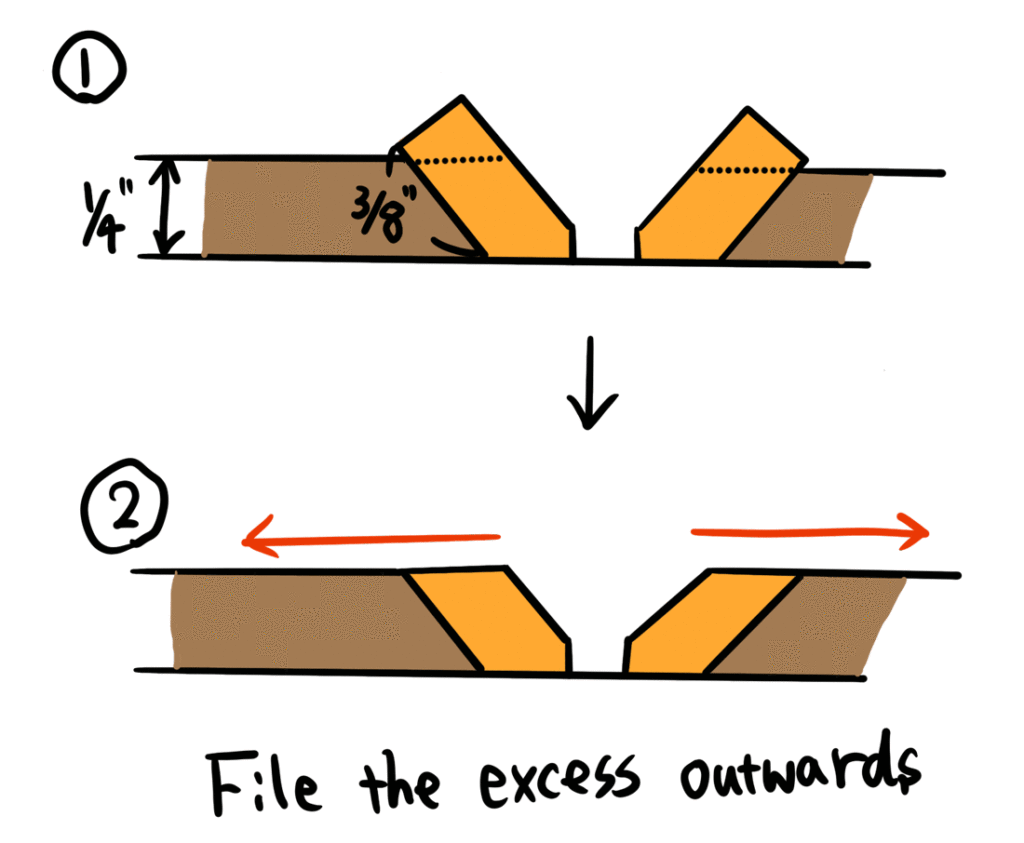
Please wait until the epoxy is fully cured before filing the excess part of the brass. When you file the brass, the brass gets heated so much by the friction and the brass may come off even if you think the epoxy is cured enough.
Additionally, when you file off the excess of the brass, please file it outwards like the following picture. Epoxy to glue wood and brass isn’t the strongest method so it’s to avoid the brass pieces from coming off by accident.
Adjusting the Thumb Nut Thickness
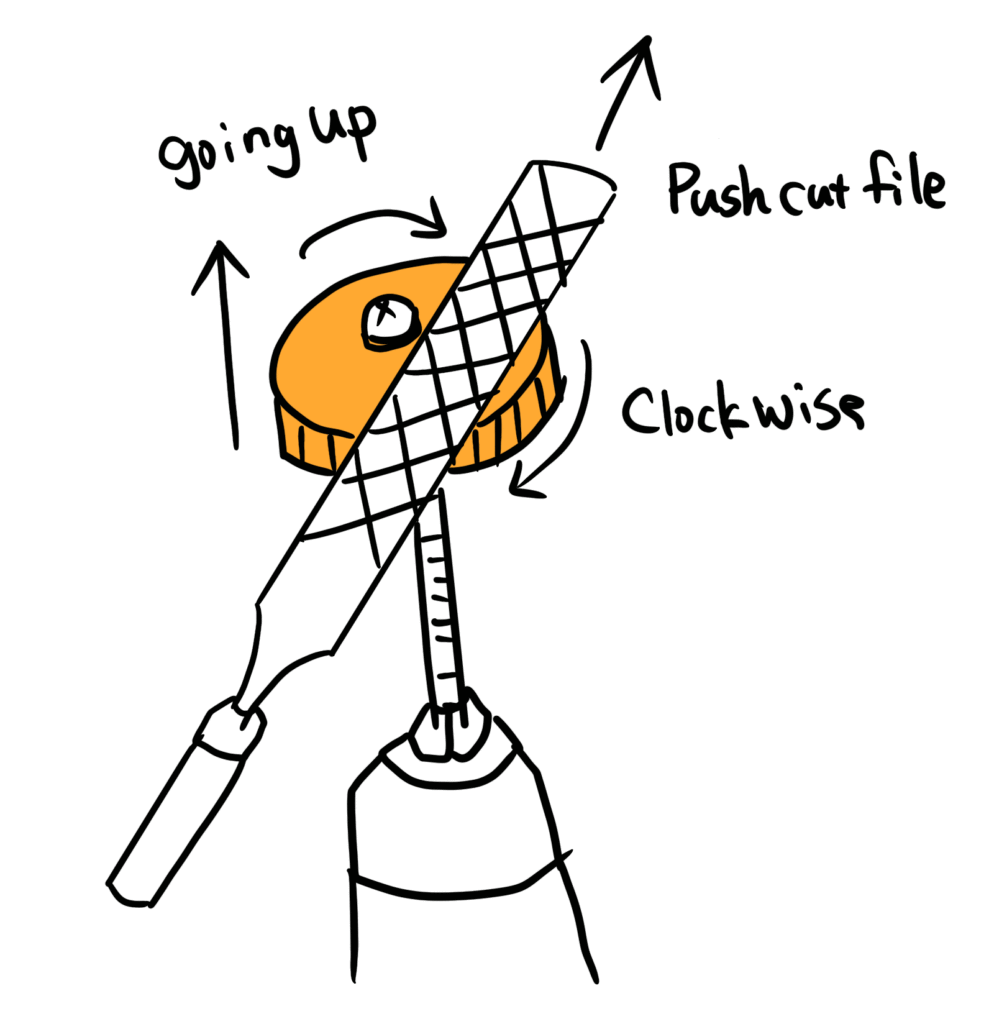
This is an easy process as long as you use a brass thumb nut, not stainless steal. I explained this in the video at 4:18(Link to YT) and all you need to know is, just let it spin the correct way.
Others
Insert Nut
According to the package, the pilot hole for the insert nut I had was 25/64 (9.9mm)” and I used a 10mm drill bit but it didn’t go all the way in. It’s probably because I used Zebrawood, which is relatively hard wood. Please be sure to test it on a scrap piece before working on the actual piece. There is a way you can make a larger hole on a small hole to fix it but if a nut is trapped slightly above the surface, you can’t take it out(This is what happened to me)!!!
Screw Positions
You can change the screw hole pattern but one important thing is, please make it like a triangle (or trapezoid if you use 4 screws). This will increase the strength against force from any directions.
Anything Else?
Here, now I put some points that I thought it’s critical but if you have any questions, like I said, please leave a comment on YouTube. I may update some more tips if needed.
Just Try!
I hope you make the router plane! I just made it but after I tried it, it’s pretty good:)
